Table of Contents
- 1 What is Machine Capability?
- 2 Clarification on Cm, Cmk vs Pm, Pmk:
- 3 Machine Capability: Subgroup or Individual Data?
- 4
- 5 When to use Machine Capability ?
- 6 Guidelines for correct usage of Machine Capability
- 7 Alternatives: When not to use Machine Capability .
- 8 Example of Machine Capability ?
- 9 How to do Machine Capability.
Try Statistical Software for Free
What is Machine Capability?
Machine capability measures a machine's actual quality relative to its specifications, abbreviated as Pm and Pmk in the international standard ISO 22514-3: 2020 or aligned standards like IS 10645 (Part 3): 2022. This is also commonly abbreviated as Cm and Cmk, with "C" indicating capability and "m" indicating Machine.
It reflects the machine's ability to meet specific performance criteria, indicated by characteristic values. Conducting a machine capability study provides a short-term analysis of the process, assuming no special causes and minimizing common causes. This study is essential for assessing the machine's performance under controlled conditions, ensuring it consistently meets quality and performance standards. Through these studies, manufacturers can pinpoint improvement areas, enhance processes, and maintain high productivity and product quality levels.
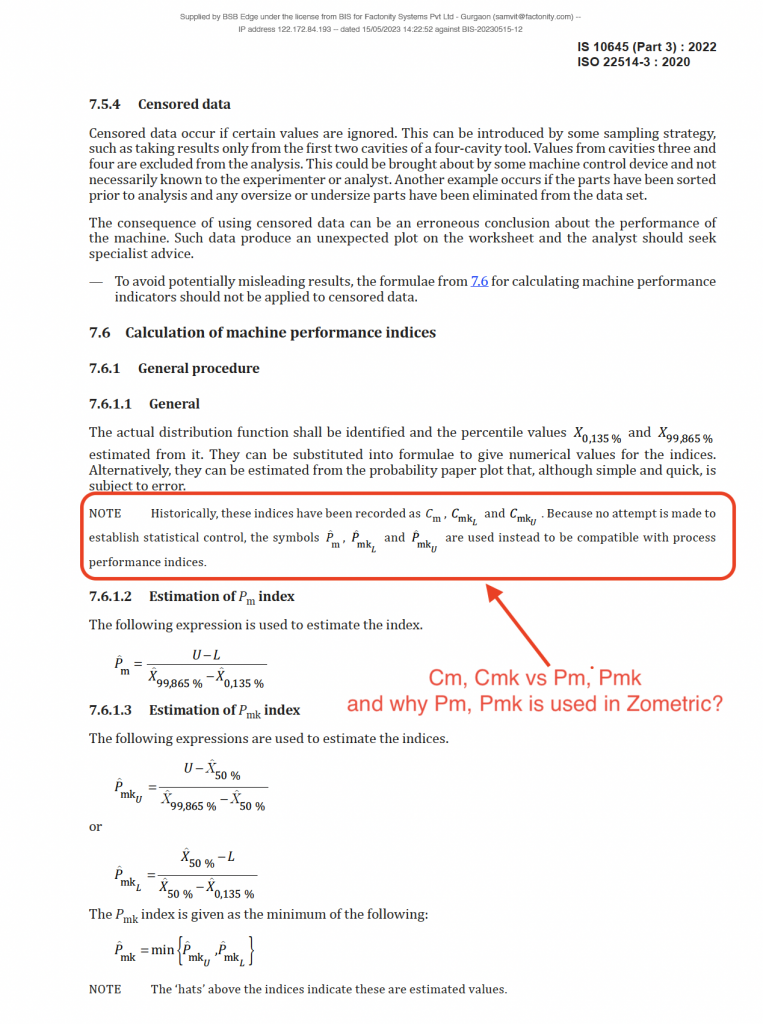
Clarification on Cm, Cmk vs Pm, Pmk:
- Mathematically, Pm, Pmk is equivalent to Cm, Cmk.
- In Zometric, machine capability follows the international standard IS 10645 (Part 3): 2022, which aligns with ISO 22514-3: 2020.
- According to this standard:
- The preferred abbreviations for machine capability are Pm and Pmk.
- The commonly used terms Cm and Cmk (as seen online) are not recommended.
- Please refer to the relevant section of the standard for clarification on the usage of Pm/Pmk over Cm/Cmk.

Cm, Cmk vs Pm, Pmk
Machine Capability: Subgroup or Individual Data?
- Machine capability data should not be analyzed like Xbar-R charts, as it is not collected in multiple rational subgroups.
- Instead, data is collected as a single subgroup consisting of 125 to 150 individual data points.
- In process control, a rational subgroup typically involves:
- Collecting 5 consecutive samples at a time.
- The next 5 samples are taken after a time gap (e.g., 30 minutes or 1 hour).
- For machine capability:
- All 125 to 150 samples must be collected consecutively from a single machine.
- No changes in machine settings, material batch, operator, or other operating conditions should occur during the data collection.
- This method ensures the machine’s inherent precision is accurately assessed, free from external influences.
When to use Machine Capability ?
Here are some situations where machine capability analysis using the normal distribution is typically employed:
- Quality control: Machine capability analysis is used to assess the capability of a manufacturing process to produce products that meet predefined quality standards. By analyzing the distribution of measurements, such as product dimensions or weights, against the desired specifications, it can be determined if the process is capable of consistently meeting those specifications.
- Process improvement: If a manufacturing process is found to be incapable of consistently producing products within the desired specifications, machine capability analysis can help identify areas for improvement. By analyzing the distribution of measurements and identifying sources of variability, steps can be taken to reduce process variation and increase capability.
- Setting tolerances: Machine capability analysis aids in setting appropriate tolerance limits for product specifications. By understanding the variation in the process, organizations can set realistic and achievable tolerances that balance quality requirements with production feasibility.
- Six Sigma projects: Machine capability analysis is often used as part of Six Sigma projects, which aim to improve the quality and efficiency of a process. It helps in identifying areas of improvement, defining process performance goals, and measuring the effectiveness of process improvements.
- Supplier evaluation: Machine capability analysis can be used to evaluate and compare the capabilities of different suppliers. By analyzing the distribution of measurements from different suppliers' processes, organizations can make informed decisions about supplier selection based on their ability to consistently meet quality requirements.
Guidelines for correct usage of Machine Capability
- Use a Sufficient Sample Size: Ensure the sample size is large enough to provide a representative assessment of the machine's performance. Typically, a sample size of at least 50-100 units is recommended for reliable capability studies.
- Ensure Data Accuracy: Collect accurate and precise data. Use calibrated measurement instruments and follow standardized procedures to minimize measurement errors.
- Conduct Studies Under Normal Operating Conditions: Perform the capability study under normal operating conditions to reflect the typical performance of the machine. Avoid unusual conditions that could skew the results.
- Minimize Variability: Control and minimize external sources of variability, such as changes in material, operator differences, and environmental conditions, to isolate the machine's performance.
- Perform Short-Term Studies Initially: Start with short-term studies to get a snapshot of the machine's capability. This helps identify immediate issues and establish a baseline for further analysis.
- Calculate Relevant Capability Indices: Use appropriate statistical methods to calculate capability indices such as Cp (Process Capability) and Cpk (Process Capability Index). These indices help quantify the machine's ability to produce within specified limits.
- Compare Against Specifications: Compare the capability indices and performance metrics against the machine's specifications and industry standards to determine if it meets the required criteria.
- Document and Analyze Data: Thoroughly document all data, conditions, and methods used during the capability study. Analyze the data to identify trends, outliers, and areas for improvement.
- Regular Monitoring and Reevaluation: Conduct regular capability studies to monitor the machine's performance over time. This helps in identifying any drifts or changes in performance that need addressing.
- Implement Continuous Improvement: Use the findings from the capability study to implement corrective actions and continuous improvement initiatives. Address any identified issues to enhance machine performance and reliability.
Alternatives: When not to use Machine Capability .
- Six Sigma - If you are dealing with a process that exhibits significant variations, defects, or quality issues, Six Sigma can be a suitable approach. By applying Six Sigma methodologies, you can identify and address the root causes of the problems, reducing defects and improving overall process performance.
- Process Capability Analysis: Use this when you need to assess the overall process performance, including all variations from machines, materials, methods, and operators. This is useful when evaluating the entire production process rather than individual machines.
- Statistical Process Control (SPC): Implement SPC when you need ongoing monitoring and control of the process through control charts. SPC helps identify and control variation in the process, ensuring consistent quality over time.
- Design of Experiments (DoE) - In cases where conducting physical experiments is necessary (e.g., testing the performance of a new material or prototype), DOE helps in efficiently exploring the parameter space and reducing the number of required experiments. This saves time and resources compared to conducting exhaustive testing.
Example of Machine Capability ?
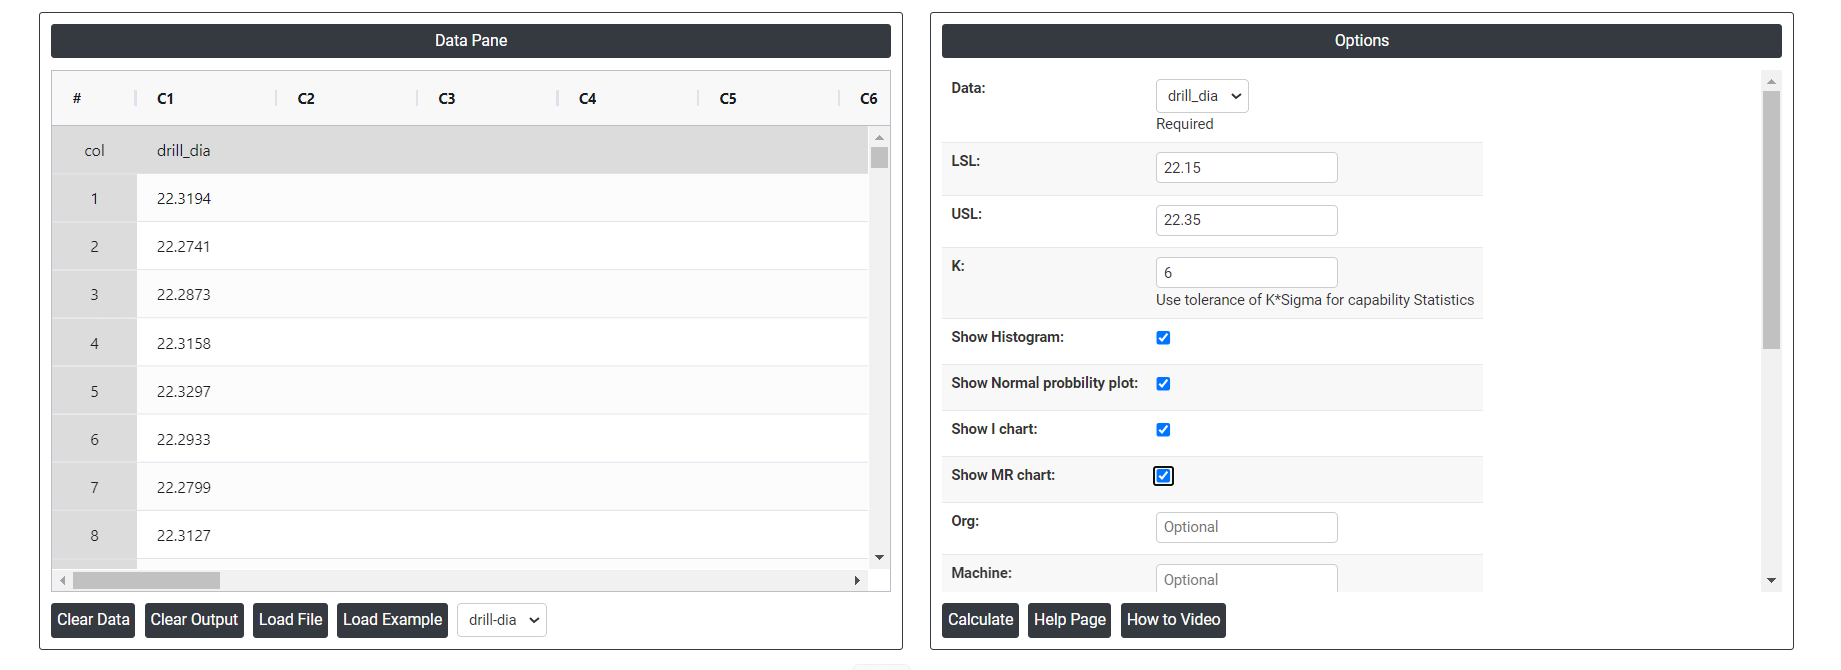
An automotive component manufacturer is developing a critical component for an OEM customer. To ensure quality, an engineer checks if a drilling machine can meet specifications for a specific part. The specification limits for the part are set at a Lower Specification Limit (LSL) of 22.15 and an Upper Specification Limit (USL) of 22.35. The engineer collects 125 samples from the machine and measures their dimensions. Using these measurements, the engineer conducts a machine capability study to determine if the drilling machine consistently produces parts within the specified limits. The following steps:
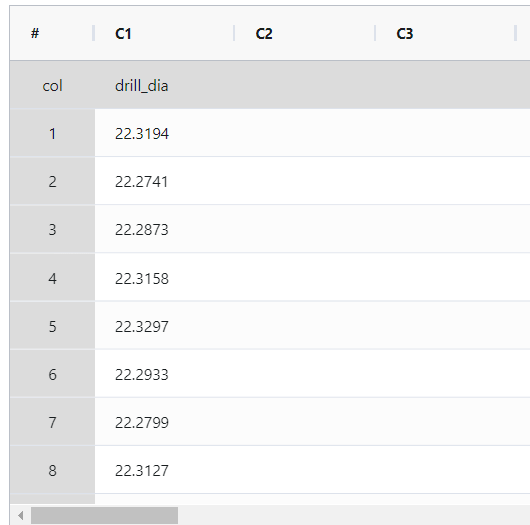
- Gathered the necessary data.

2. Now analyses the data with the help of https://qtools.zometric.com/ or https://intelliqs.zometric.com/.
3. To find Machine Capability choose https://intelliqs.zometric.com/> Statistical module> Graphical analysis>Machine Capability.
4. Inside the tool, feeds the data along with other inputs as follows:

5. After using the above mentioned tool, fetches the output as follows:


How to do Machine Capability.
The guide is as follows:
- Login in to QTools account with the help of https://qtools.zometric.com/ or https://intelliqs.zometric.com/
- On the home page, choose Statistical Tool> Graphical analysis >Machine Capability .
- Click on Machine Capability and reach the dashboard.
- Next, update the data manually or can completely copy (Ctrl+C) the data from excel sheet and paste (Ctrl+V) it here.
- Next, you need to put the values of lsl, usl and K.
- Finally, click on calculate at the bottom of the page and you will get desired results.
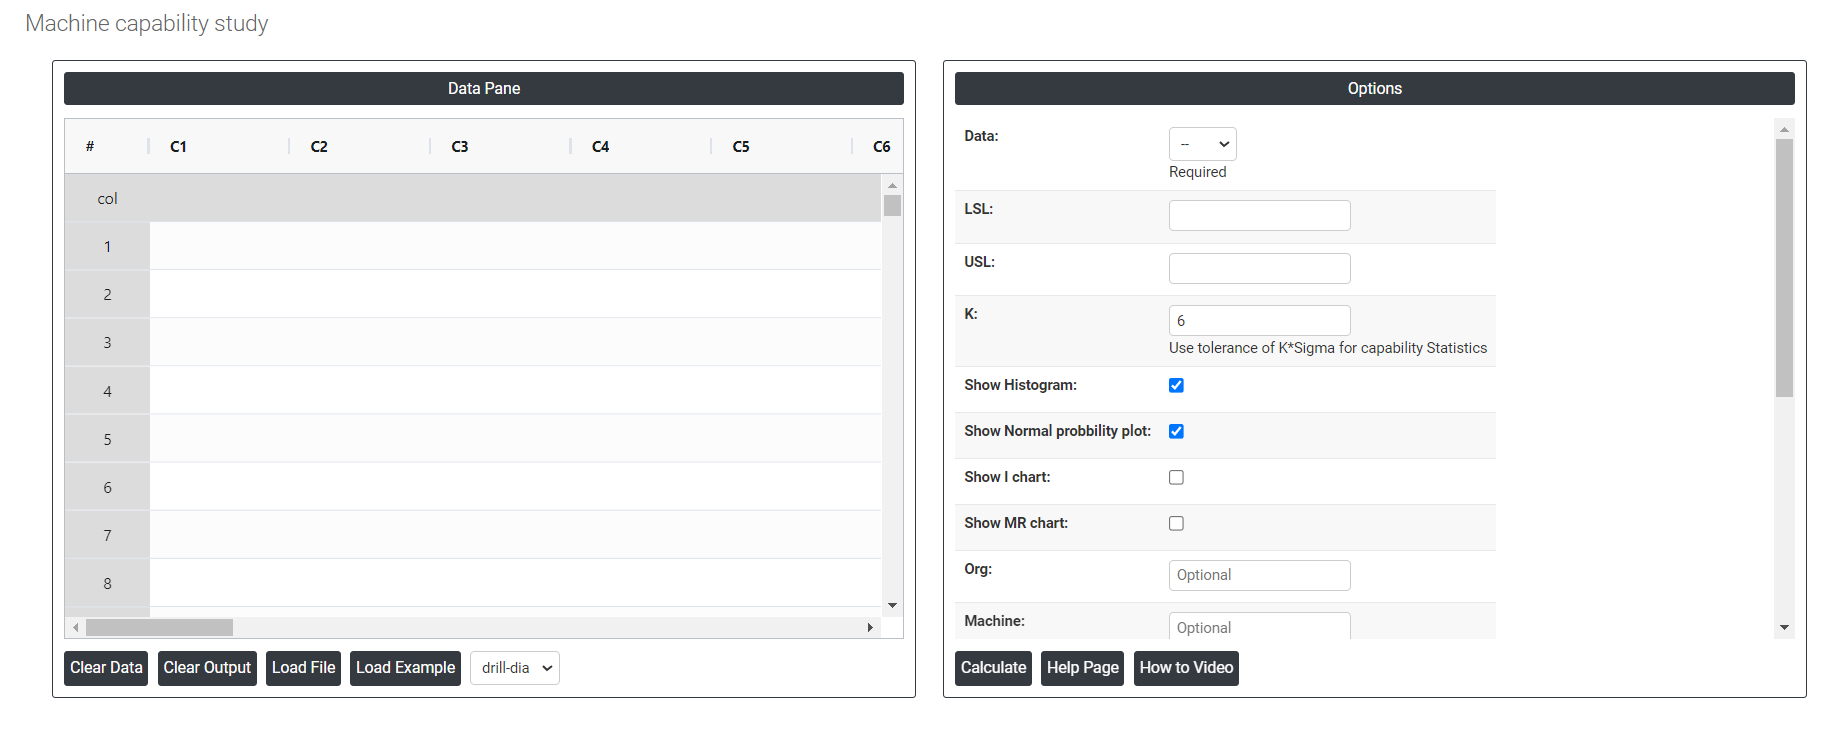
On the dashboard of Machine Capability, the window is separated into two parts.

On the left part, Data Pane is present. In the Data Pane, each row makes one subgroup. Data can be fed manually or the one can completely copy (Ctrl+C) the data from excel sheet and paste (Ctrl+V) it here.
Load example: Sample data will be loaded.
Load File: It is used to directly load the excel data.
On the right part, there are many options present as follows:
- Lsl: LSL in Machine capability refers to the Lower Specification Limit. It is the lower boundary or threshold set for a specific parameter or characteristic. In Machine capability analysis, LSL is used to determine whether a Machine is capable of producing outputs within the desired range or specifications.
- Usl: USL in Machine capability refers to the Upper Specification Limit. It represents the upper boundary or threshold set for a specific parameter or characteristic. During Machine capability analysis, the USL is used to assess whether a Machine is capable of producing outputs within the desired range or specifications.
- K: In Machine capability, K is used to evaluate the capability of a process in relation to the specification limits.
- Show Histogram: Visualizes the distribution of measurements for the part being produced, showing how the data is spread around the mean. It helps assess whether the machine's output conforms to the specified limits and identifies any deviations from normal distribution.
- Show Normal probability plot: Assesses whether the distribution of the measurements follows a normal distribution. This is crucial for determining if the machine's performance is consistent with statistical assumptions used in capability analysis.
- Show I chart: Monitors individual measurement values over time to detect variations and trends. This chart helps ensure the machine is stable and consistently operating within specified limits.
- Show MR chart: Analyzes the variability between consecutive measurements to assess the consistency of the machine's performance. It complements the I chart by providing insights into the process variation and stability.
- Org: The name of the company or facility where the machine capability study is conducted. Example: ABC Manufacturing Co.
- Machine: The specific equipment or machinery being evaluated in the capability study. Example: Drilling machine, forging machine.
- Part: The component or product being manufactured by the machine. Example: Automotive component, piston ring.
- Variable: The specific characteristic or dimension of the part being measured. Example: Diameter, length, width.
- Unit of Measure: The units used to quantify the variable being measured. Example: Millimeters (mm), inches (in).
- Study date: The date on which the machine capability study was conducted.
- Operator: The name of the machine being operated.
- Inspector: The name of the tool or instrument used for measuring. Example: "Micrometer Model Y."
- Gauge: The measurement instrument or tool used to assess the variable. Example: Caliper, micrometer.
- Download as Excel: This will display the result in an Excel format, which can be easily edited and reloaded for calculations using the load file option.